
Here’s a guide on how to change the skin color of Lita items.
If you prefer voice explanation, I also explain this on YouTube here:
If you prefer text instructions, please continue scrolling down.
Step 1
First, just like loading a character, load the arm item into VTube Studio.
(This part can get long, so I’ll skip the detailed explanation here.)
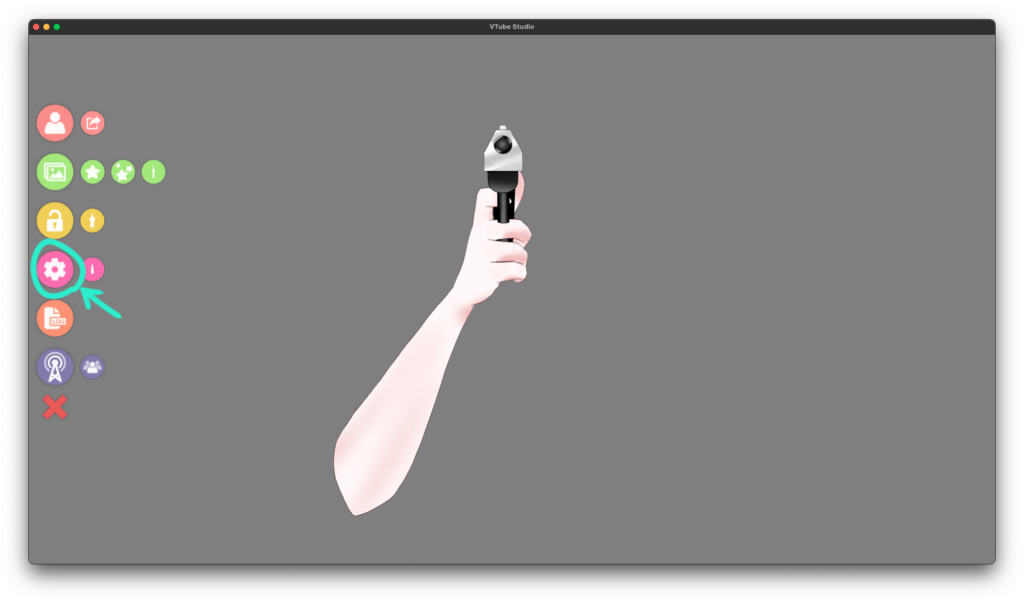
Step 2
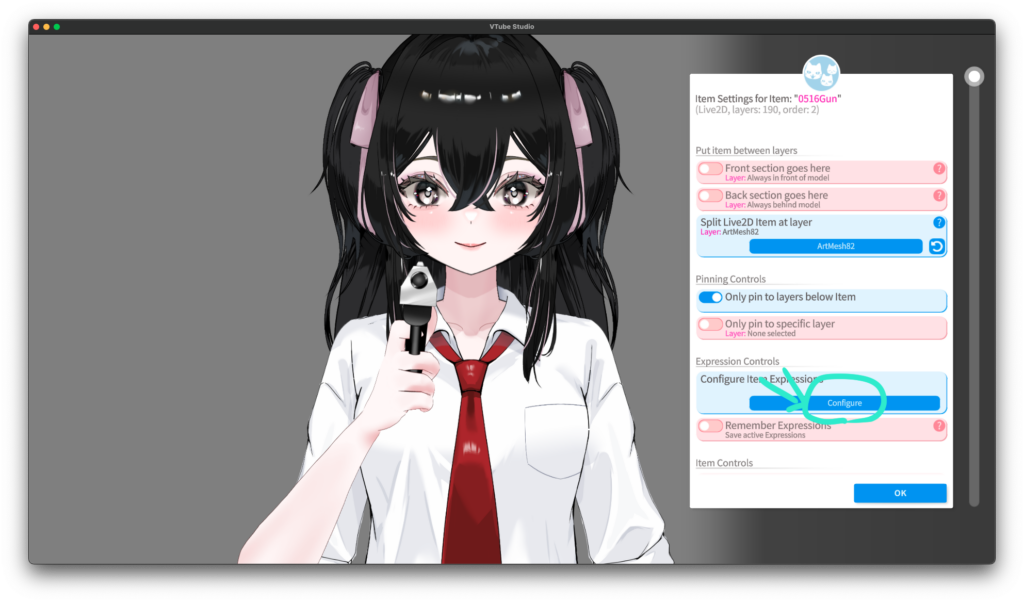
Click the gear icon ↓
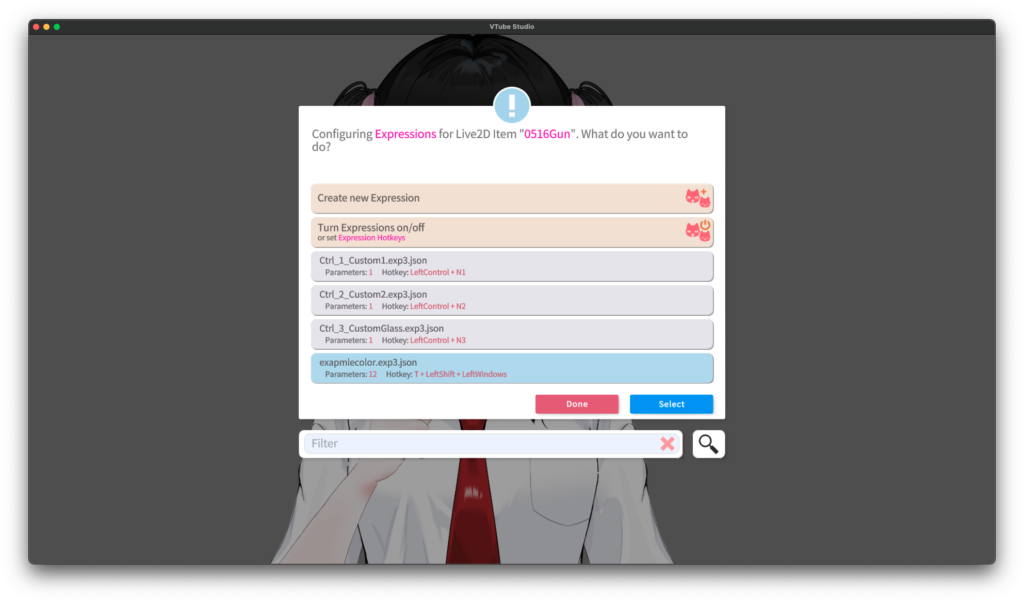
Step 3
Click the movie-like icon at the top.
A list of files with keybind settings will appear on the right side.
Above those folders, click Expression Editor.

Step 4
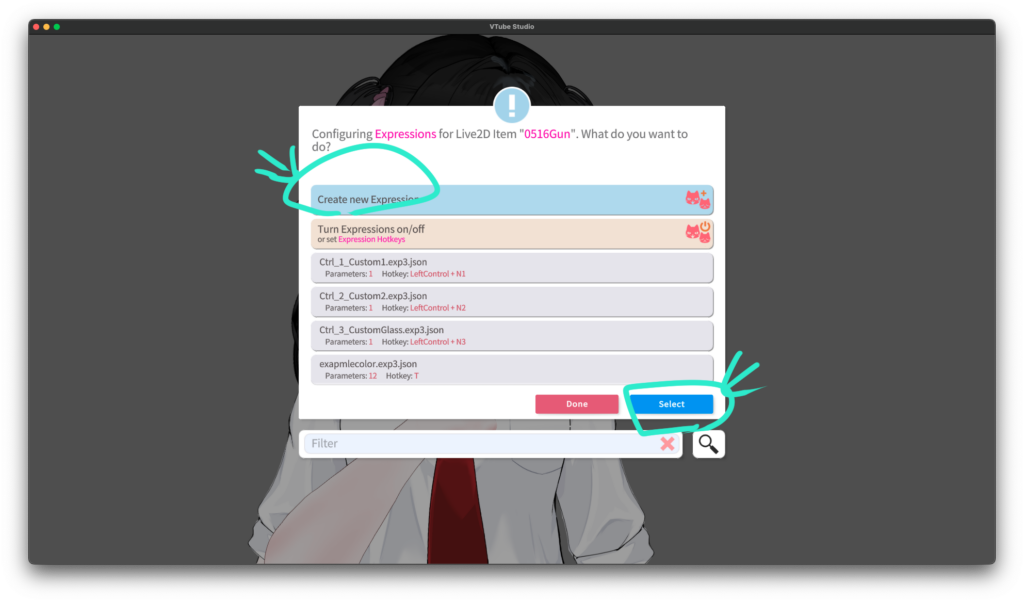
You’ll see a screen like this.
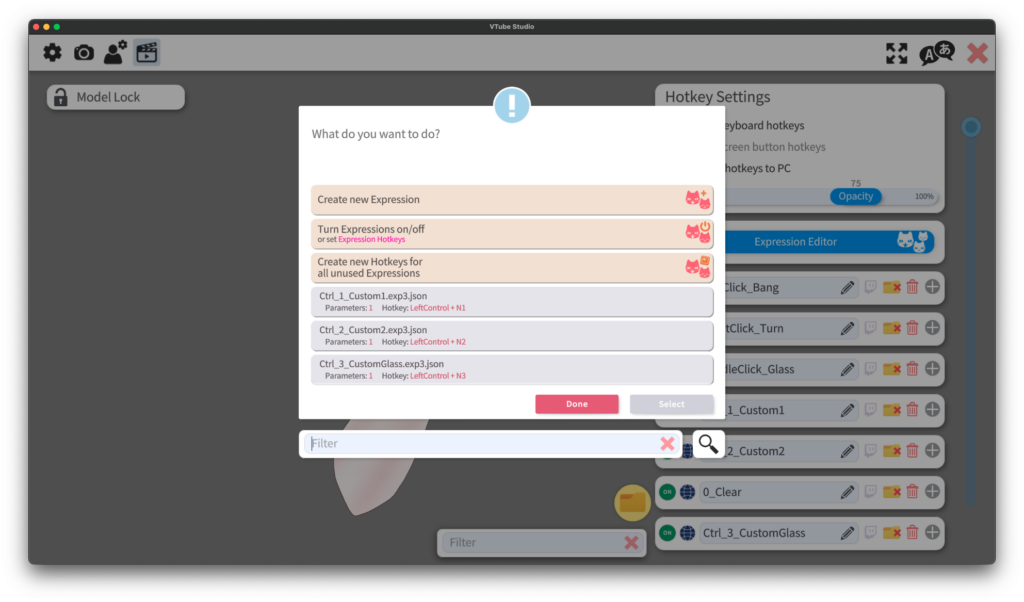
Click Create New Expression
It will turn blue, then click OK.

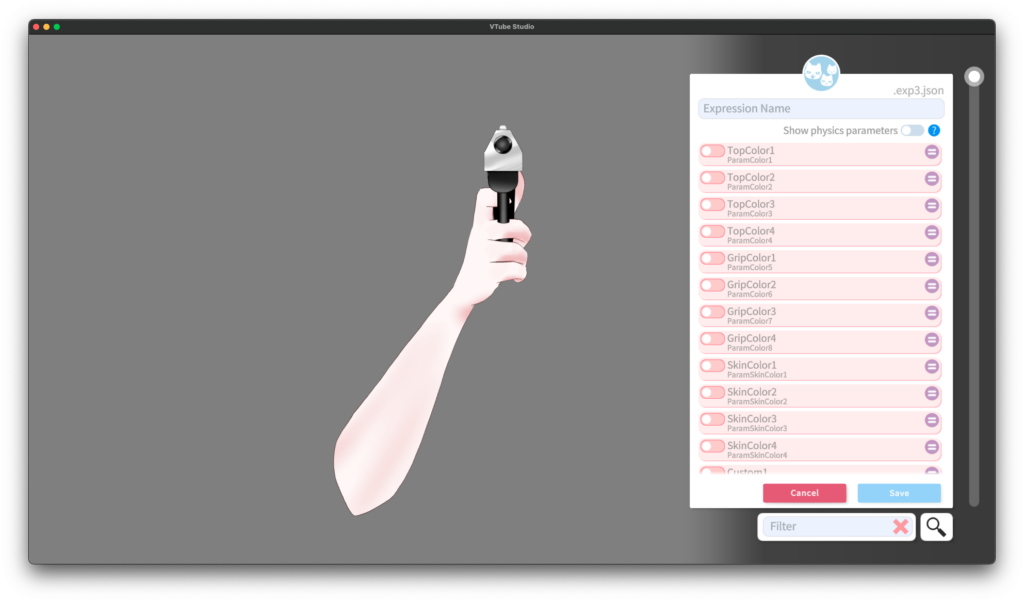
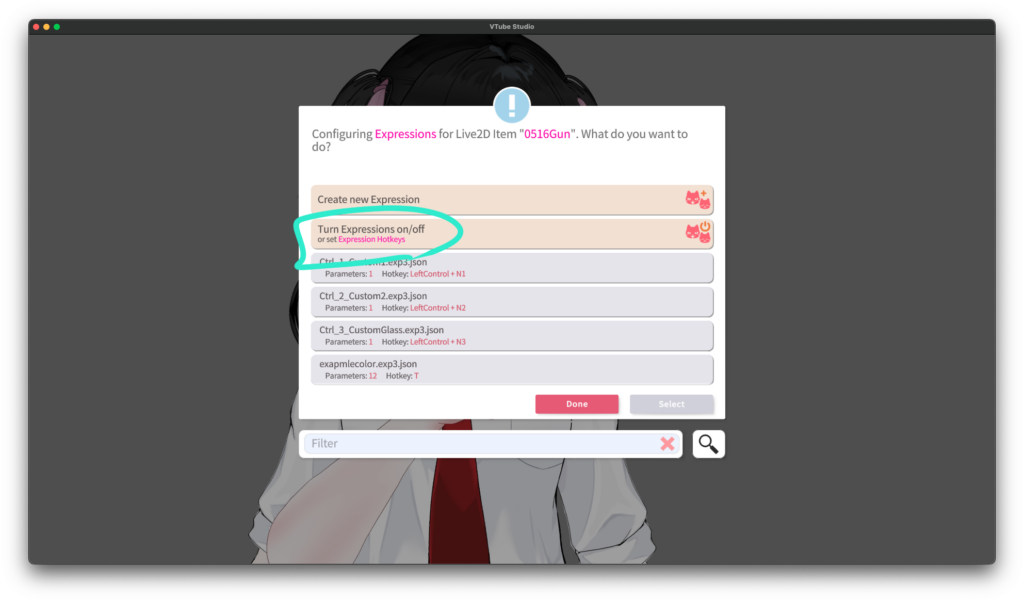
Step 5
A screen like this will appear.
Step 6
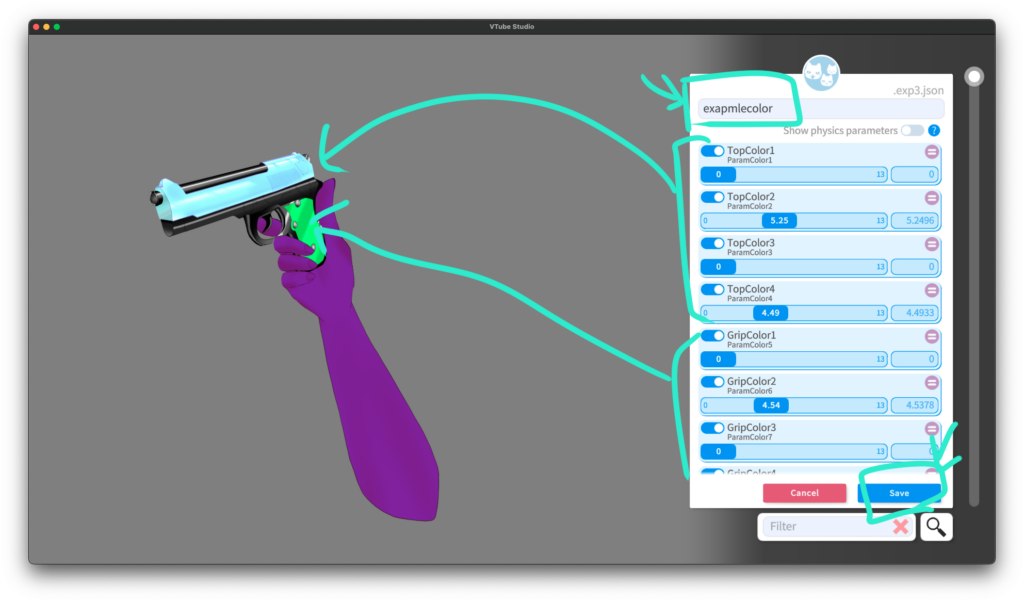
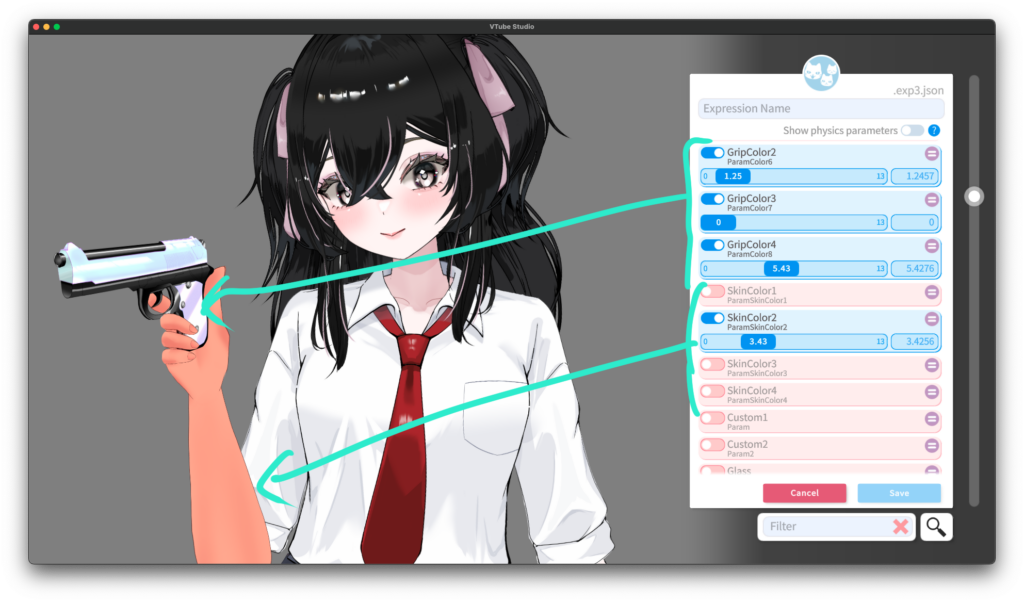
Enter any name you like for the file name.
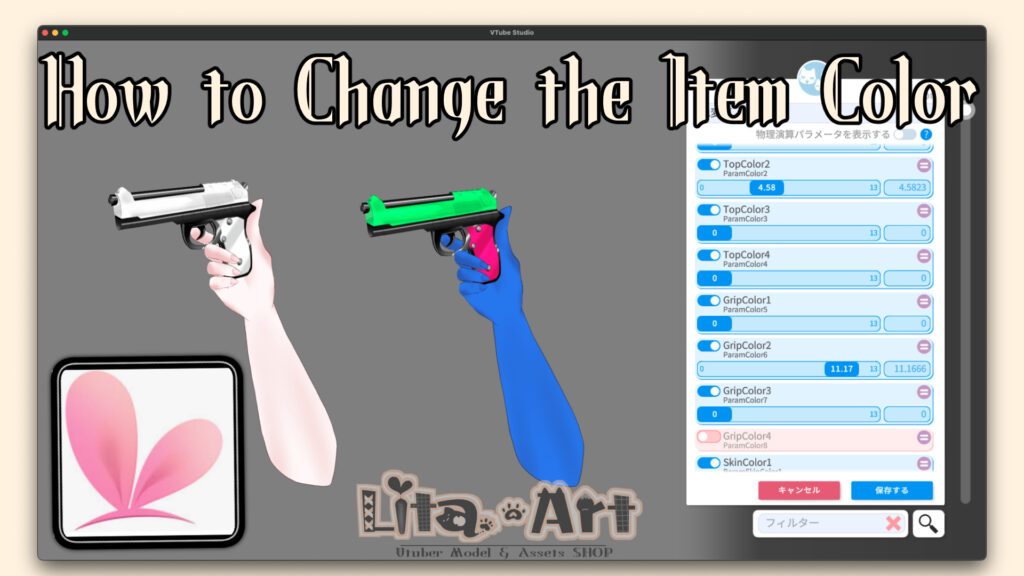
Lita items use parameters named “Color”.
When you click the button, the parameter turns blue and the slider becomes adjustable.
Here’s what each parameter does:
① Brightness (Multiply)
→ Darkens the color.
② Color (Multiply Color)
→ Changes the color itself.
Around the middle of the slider is optimized for skin tones.
Toward the far right, I added more extreme colors like blue or yellow.
If you want to change skin color, adjusting Color2 is the easiest and most noticeable.
③ Screen Brightness
→ Moving the slider to the right will turn it pure white.
④ Screen Color
→ Similar to brightness, but with added color, so it changes how colors appear.
Try combining these to get the color you like.
If you’re just changing the arm to a tan skin tone, usually adjusting ① and ② is enough.
Step 7
Some items also support item color changes.
All color-adjustable parameters are named “Color”,
so just move the sliders to see what changes.
Once you’re satisfied, click Save.
Step 8
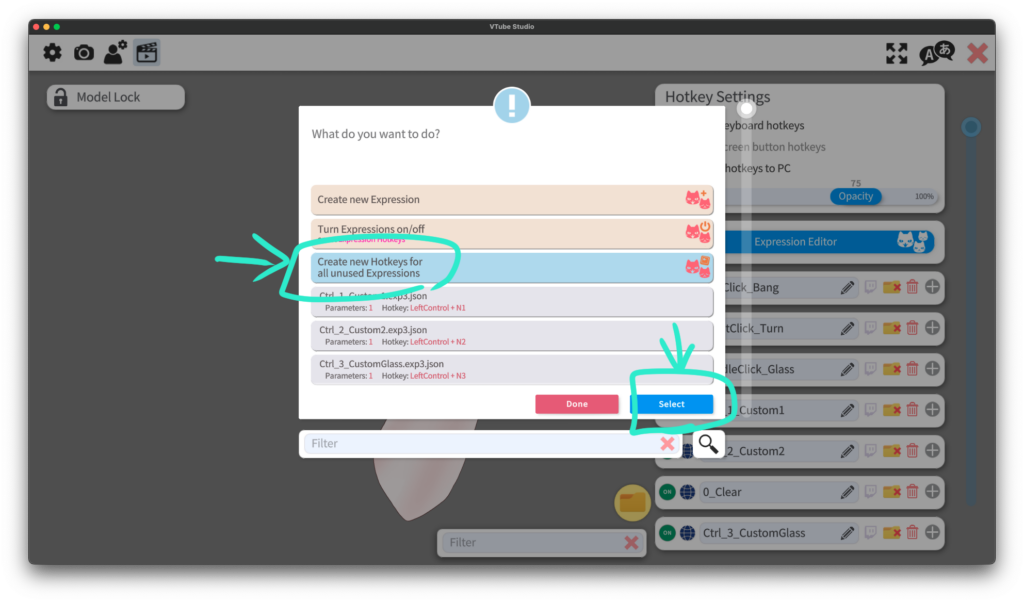
A screen like this will appear.

Click Create new Hotkeys for all unused expression so it turns blue,
then click OK.
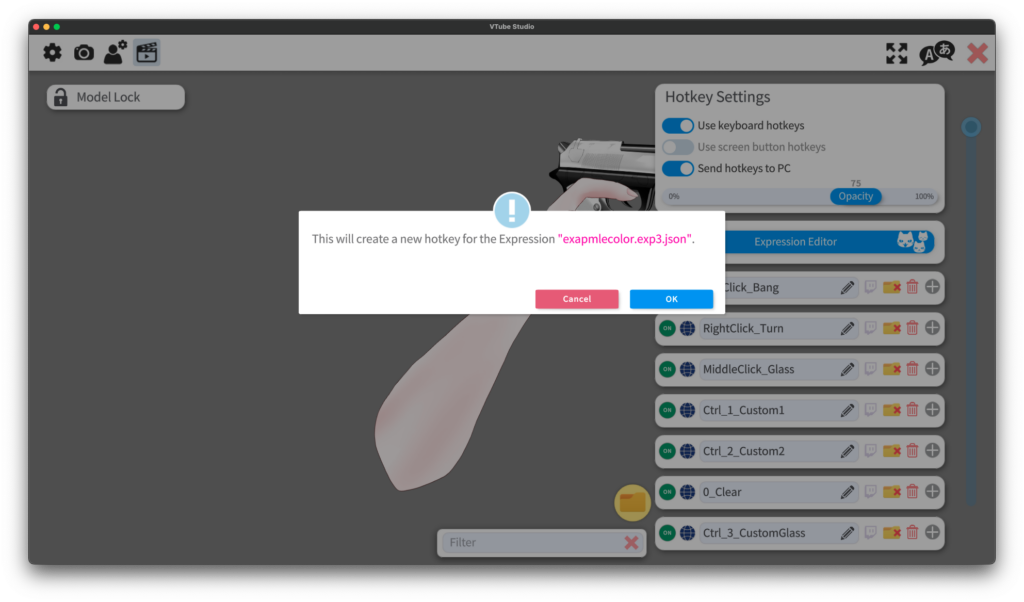
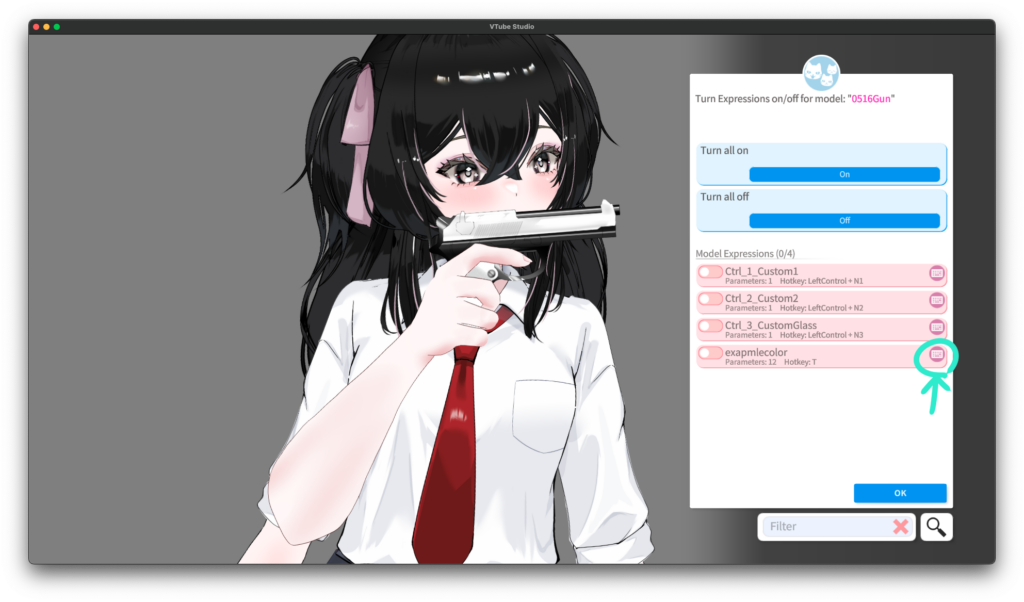
Step 9
Another confirmation screen will appear — click OK.
Step 10
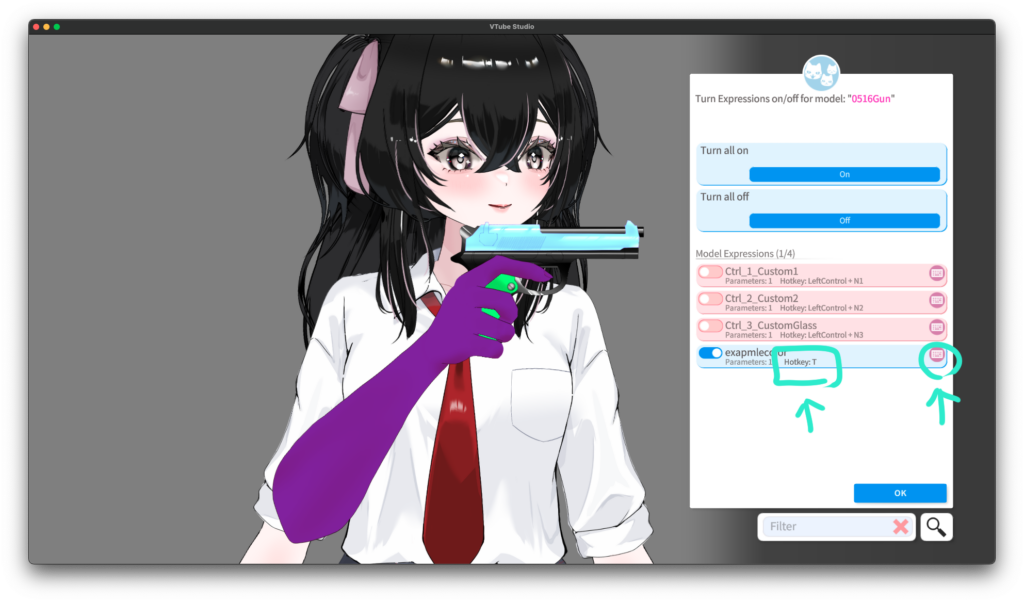
At the bottom of the parameter list on the right, you’ll see the settings you just created.
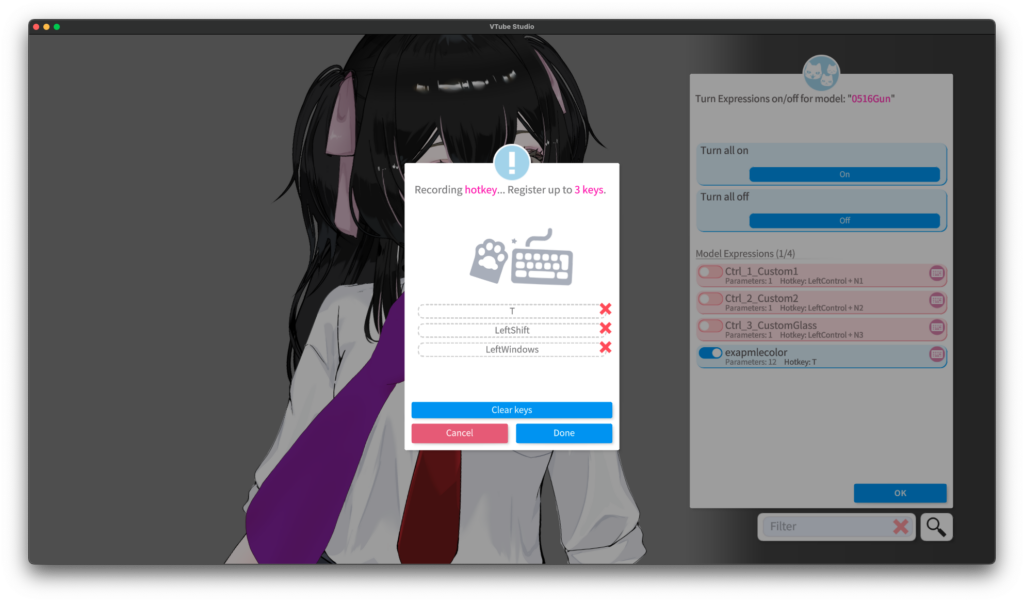
Click Key Combination.
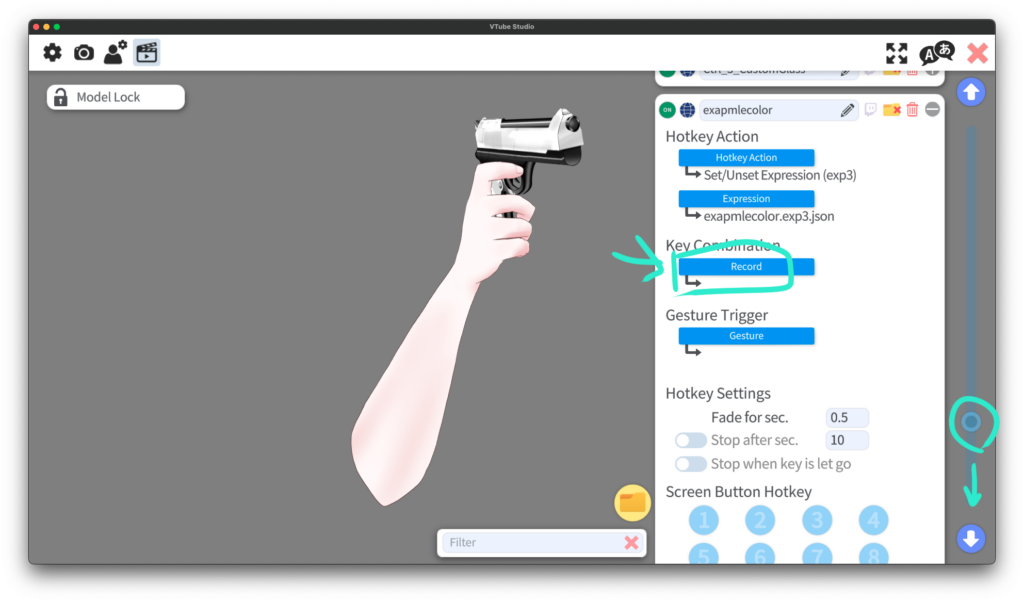
Press any keys you like to assign the keybind.
If the keybind overlaps with another one, a yellow warning icon will appear.
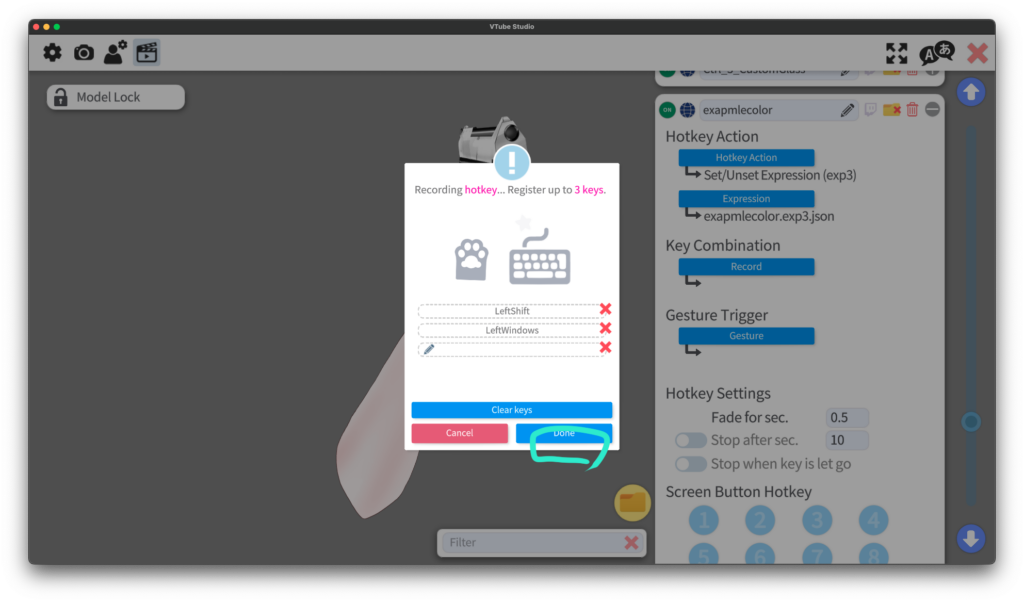
When finished, click Done.
Now pressing that key will apply the color you set.
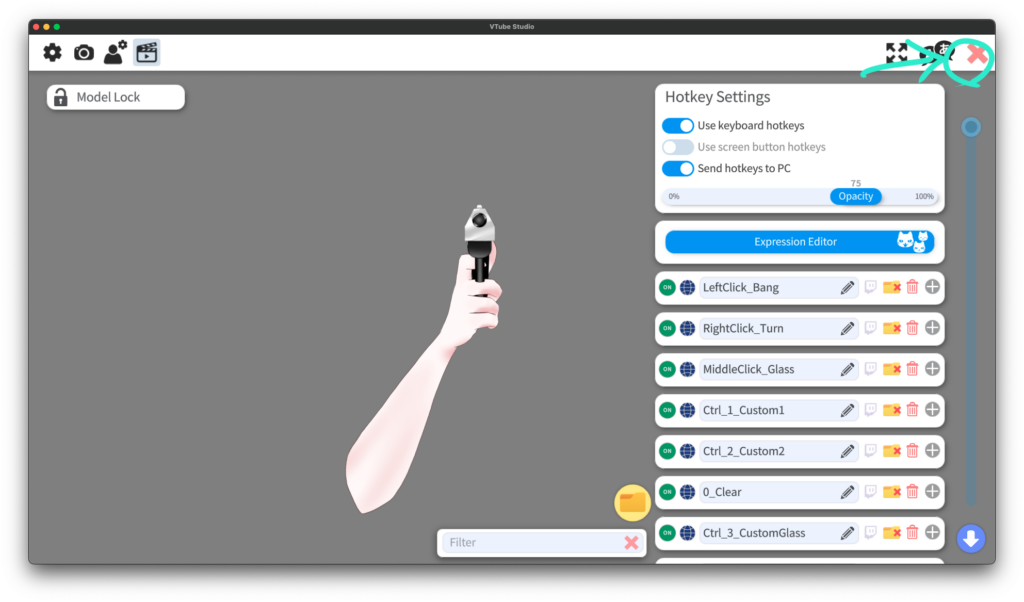
Step 11
Click the X button on the right to close the window.
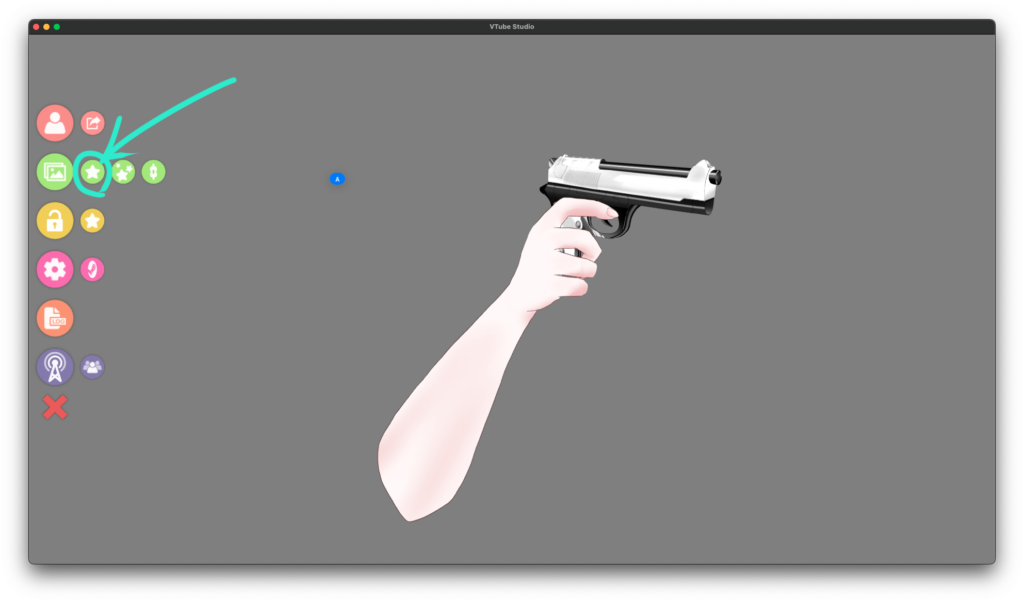
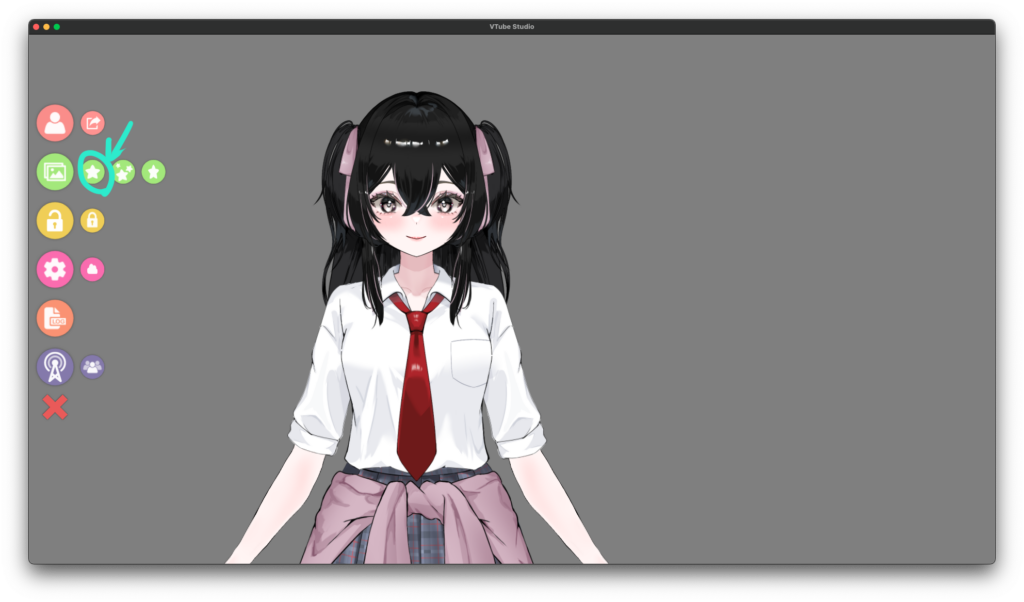
Step 12
Next, load it as an item.
Click the ⭐ icon.
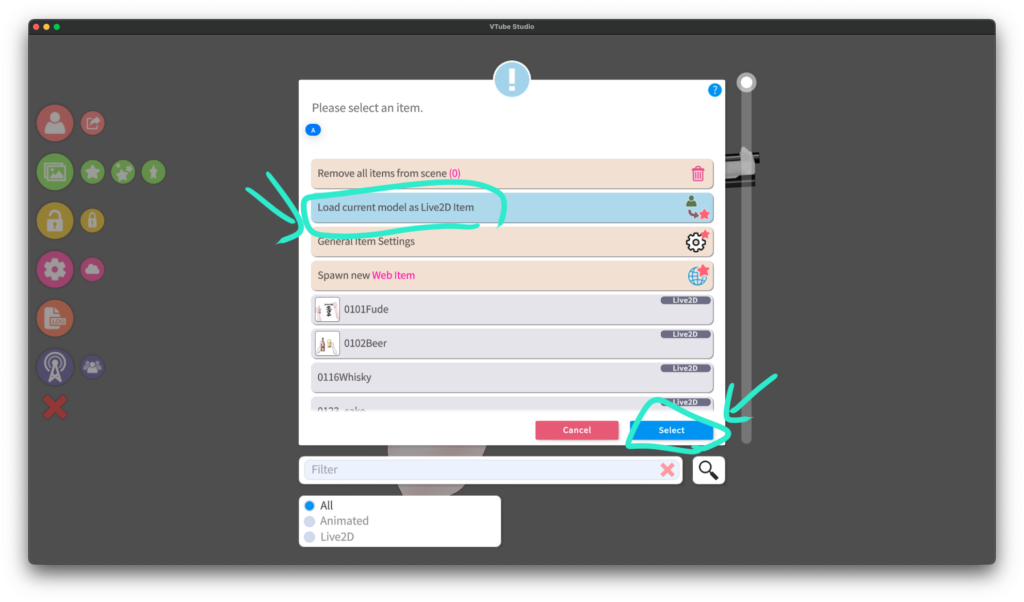
Select Load current model as Live2D item, turn it blue, then click OK.
Step 13
A confirmation screen will appear — click OK.
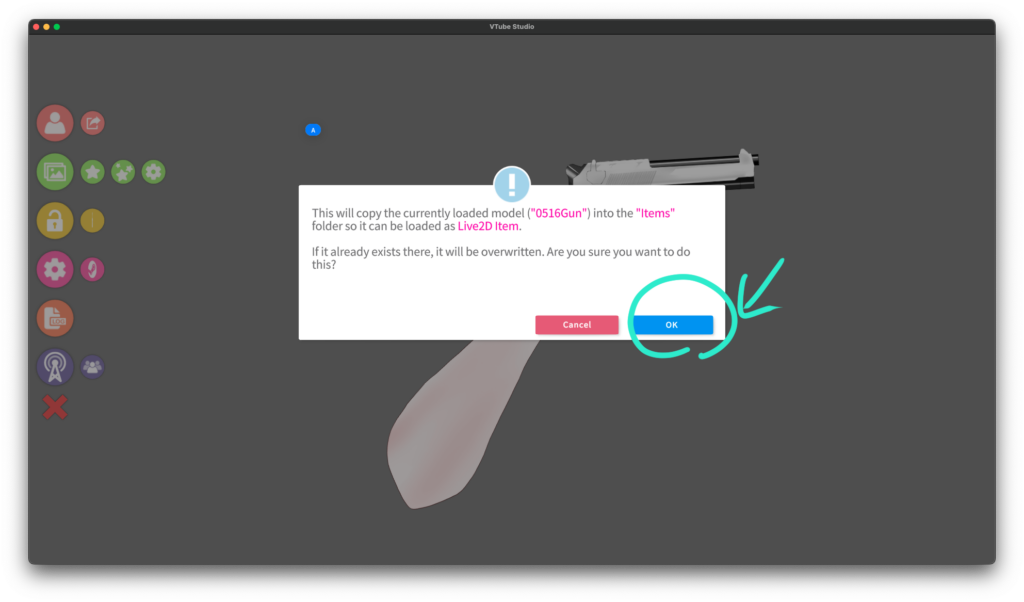
The item will appear.
Click Save at the bottom right.
Step 14
Now load your model.
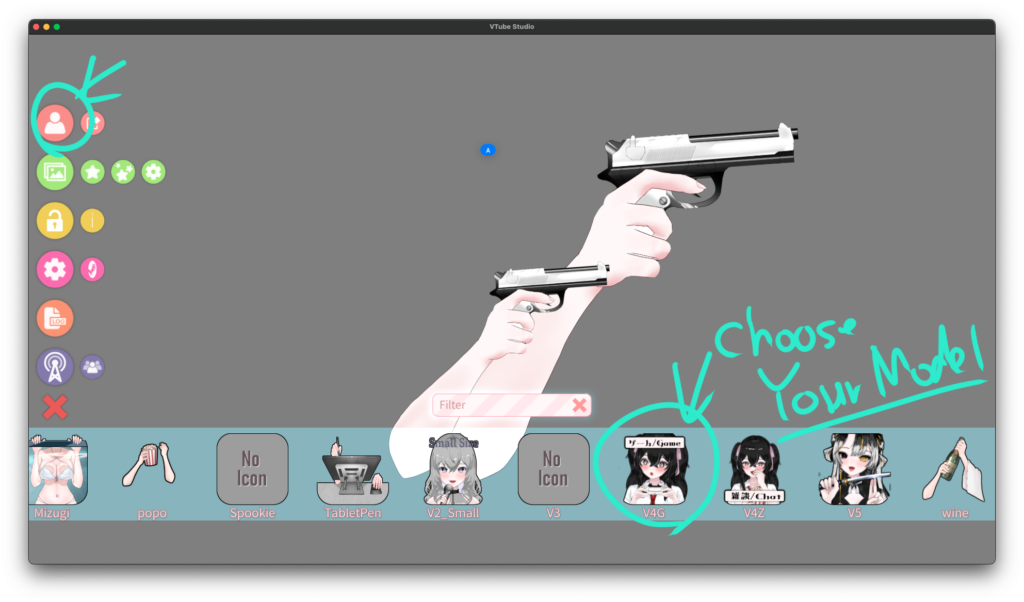
Let’s load your own model.
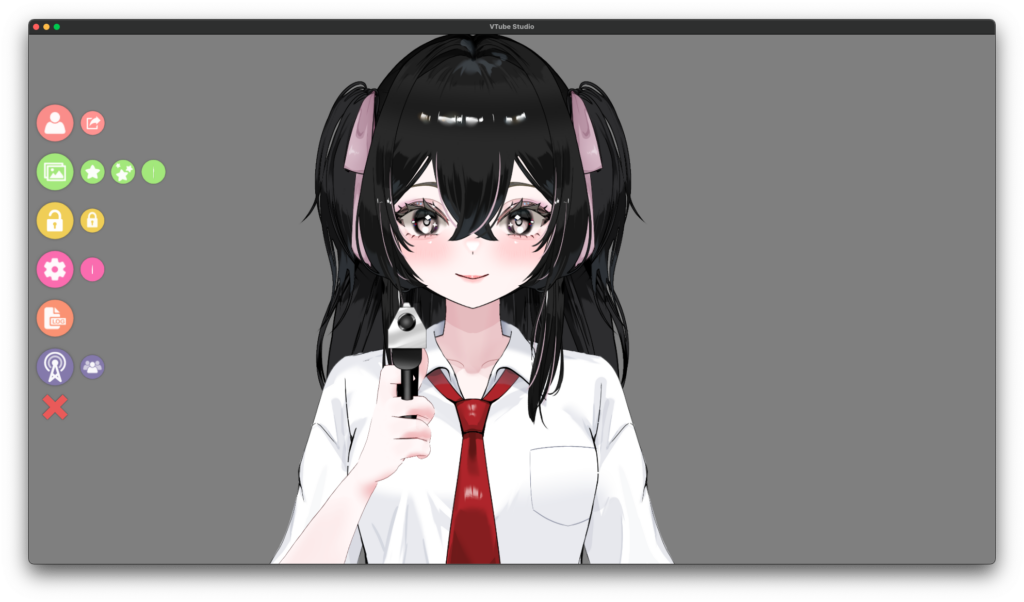
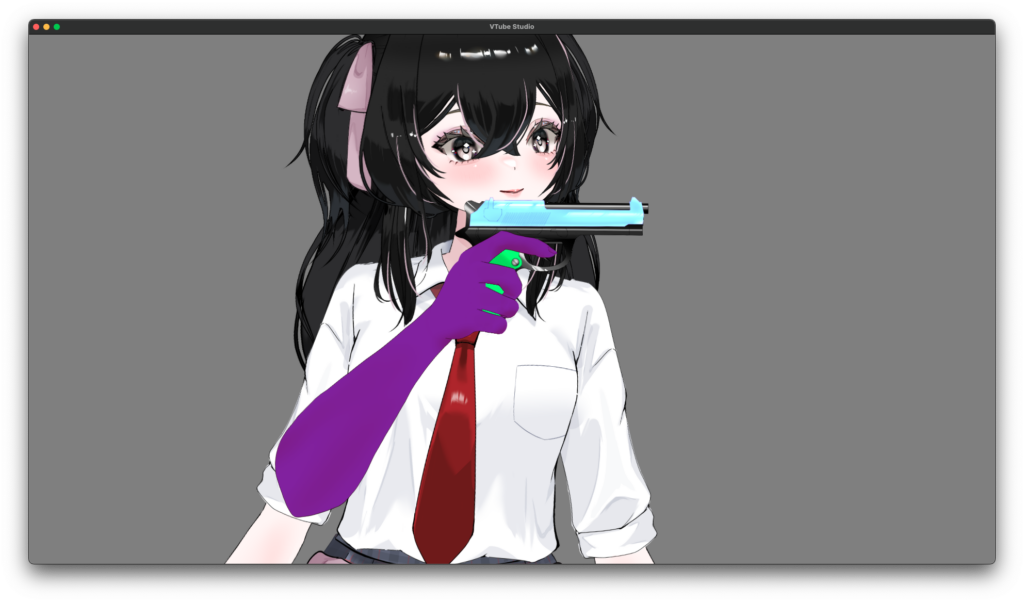
This time, I’ll use the generic black-haired JK model.
Let’s have her fire the gun 😄
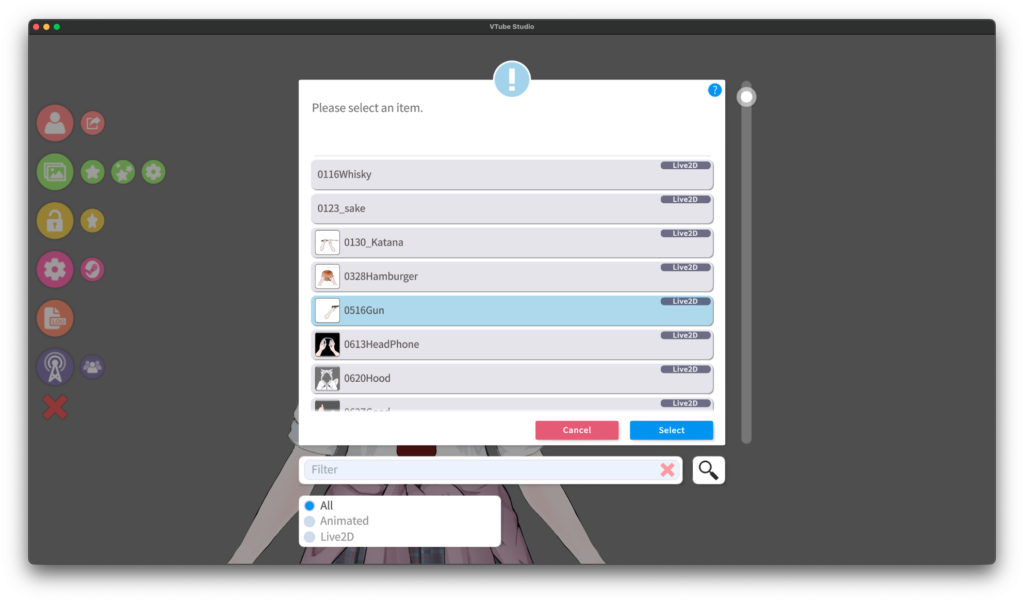
Step 15
Click the ⭐ icon again.
Find the gun item you just registered — there it is!
Click it so it turns blue, then click OK.
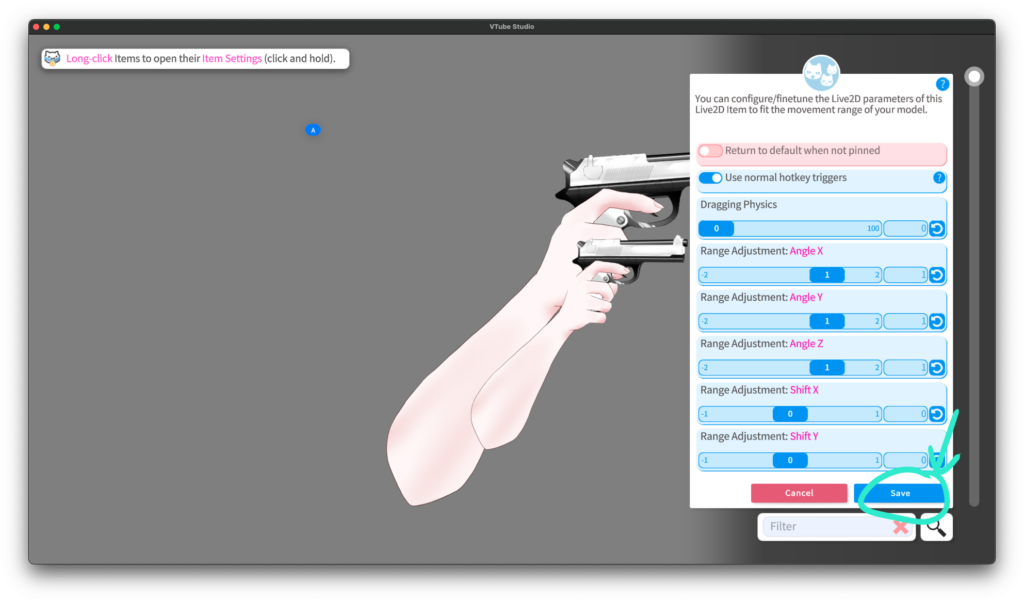
Step 16
A screen like this will appear.
Personally, I prefer turning “Attach to model” OFF.
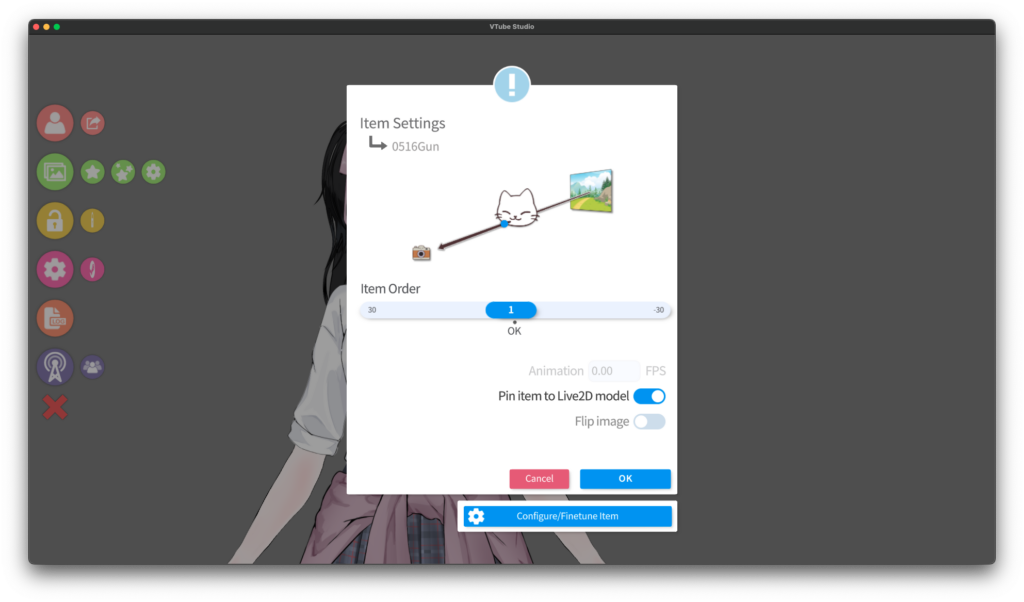
You can turn it ON if you like,
but with very dynamic models, the arm might move in weird directions.
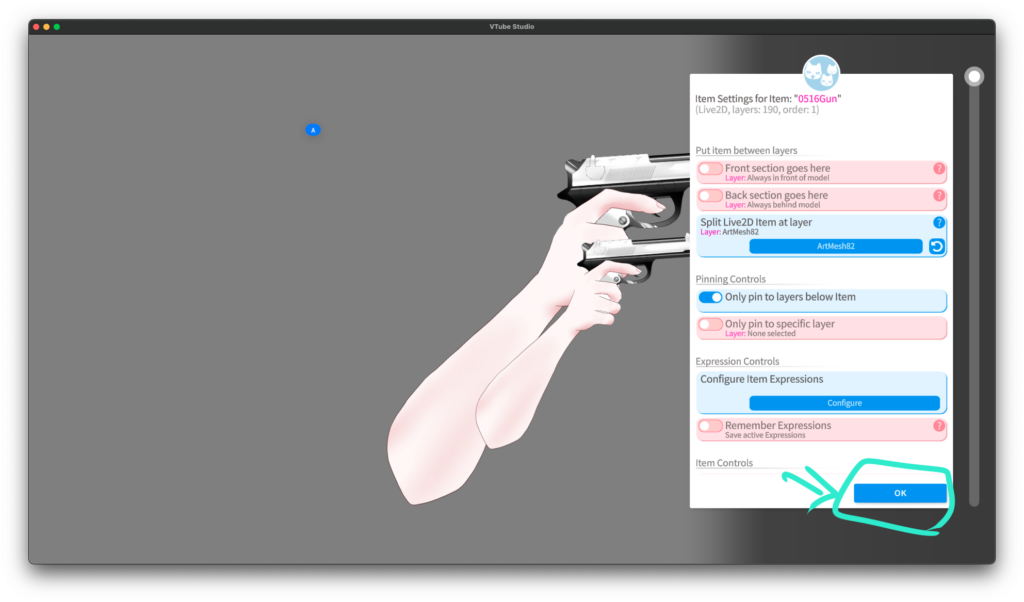
Step 17
The item appears — the third arm!
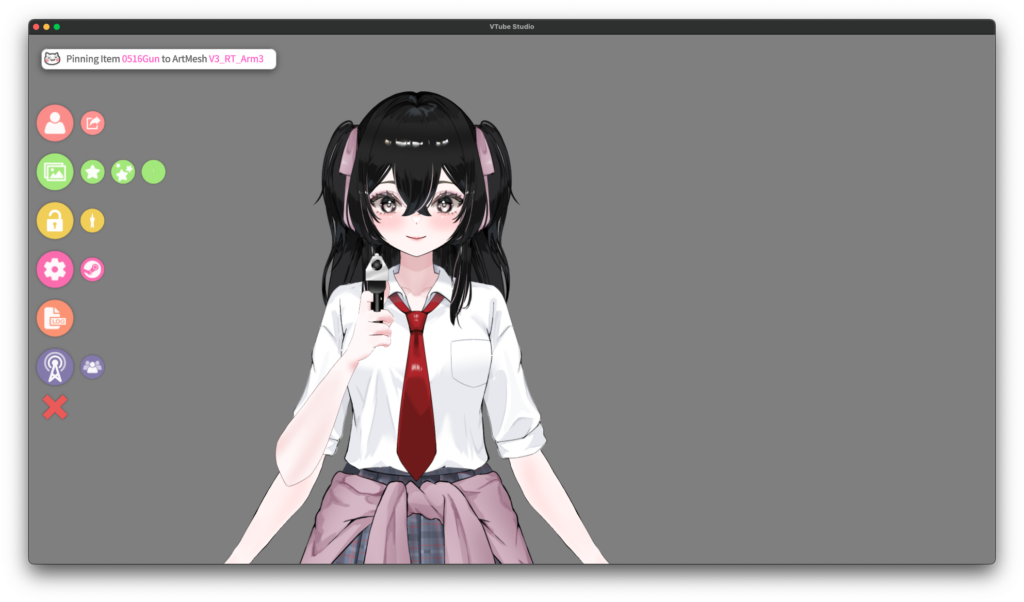
Adjust the position by click-dragging.
Use the mouse wheel to adjust the size.
Step 18
Hide the lower part of the arm so it doesn’t look like the model has three arms.
🎉 Great work!
That completes the item setup!
Try pressing the keybind you set — the color should change!
Bonus Section ↓
Bonus: Changing Colors After Loading as an Item
You can also change colors after the item is already loaded.
Click and slightly long-press on the item (about 1 second).
The item will shake slightly, and settings will appear on the right.
In Item Expression Settings, you’ll see the same screen as before.
Click Create New Expression File.
You’ll see the same screen again.
Set the colors however you like.
Here’s a quick explanation again:
- Top Color → Upper part
- Grip Color → Grip area
- SkinColor → Arm skin color
Once decided, give the file a name and save it.
Don’t forget the file name!
Click the created file and press OK to edit it again if needed.
Assign Keybinds
Click Expression Hotkeys, turn it blue, and click OK.
Click the keyboard icon on the right.
Press your desired keybind and set it.
Click Done.
Turn the parameter ON to check the color.
You can also confirm the keybind is listed correctly.
Once everything looks good, click OK.
✅ All done!
Great job, and thanks for your hard work!
コメントを残す